ONYX - 9.0 - Installation - Guide d'installation ONYX Server sur Windows/en
Différence entre versions
(Page créée avec « 2. Enter the following URL: ») |
(Page créée avec « *From the local server: <code><big><nowiki>http://127.0.0.1:8002</nowiki></big></code> *From a workstation in the network: <code><big>http://<ip.du.serveur>:8002</big></code> ») |
||
| Ligne 83 : | Ligne 83 : | ||
2. Enter the following URL: | 2. Enter the following URL: | ||
| − | * | + | *From the local server: <code><big><nowiki>http://127.0.0.1:8002</nowiki></big></code> |
| − | * | + | *From a workstation in the network: <code><big>http://<ip.du.serveur>:8002</big></code> |
Version du 17 juillet 2019 à 13:50
This page explains how to install ONYX Server on Windows.
Sommaire
Requirements
- ONYX Server 9.0 runs under Windows Server 2012 R2, 2016 or 2019
- The Web Apache server version 2.2 or 2.4 must be installed on the server before ONYX Server is installed
- If you wish to call ONYX Server functions via the additional API REST module (web service), install Node.js version 8.10 or more beforehand.
Installing the Mapping server
Launch Setup_ONYX_Server_XXXXX.exe. The setup will execute itself in the following order:
- Home page
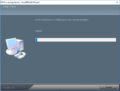
- M-Processing Server loading page: this can load for a couple minutes; once it is loaded, a second window opens to install the M-Processing Server
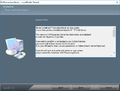
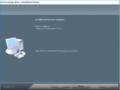
- M-Processing Server Home page
- Terms of use
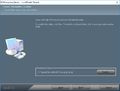
- Requirements and recommendations: read this page carefully to set the installation environment properly
- Installation folder: choose the M-Processing Server folder, a standard installation path is already filled in by default, however we would recommend you to install it in a folder which is specific to the root of your system drive, ex: C:\Mapping\M-ProcessingServer
- Installation mode: two installation modes are available, Custom or Typical. In both cases, the installation is done in the file chosen previously but the specific configuration options are available in Custom mode. We recommend you to choose the Typical installation mode. You can always come back to the options of the Custom mode and change them after the installation.
- Apache configuration folder: specify the path of the Apache conf folder
- Apache binary folders: specify the path of the Apache bin folder
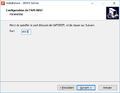
- Installation parameters: three parameters are required. This data is used to parameter the M-processing Server in the Apache configuration folder: name of the company, name of the server on which the software is installed, IP address of the serveur (we recommend you to use the local loop address "127.0.0.1")
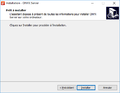
- Installation of the software. Once the software is installed, the end page is displayed, click on the Finish button, ONYX Server is then installed and the following page lets you parameter the basic setup
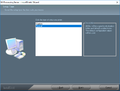
- Extensions available: list of all the extensions available. Caution: some extensions may need you to abide by some requirements!
- Leave the setup: If no extensions are needed, you leave the setup via the Cancel button in image 12, a popup window will appear, click on Yes to leave the setup.
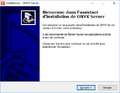
1.Home page
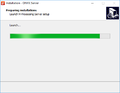
2.M-Processing Server loading page
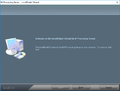
3.M-Processing Server Home page
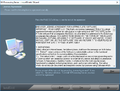
4.Terms of use
5.Requirements and recommendations
6.Installation folder
7.Installation mode
8.Path of the Apache configuration folder

9.Path of the Apache binary folders
10.Installation parameters
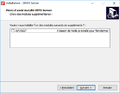
12.Extensions available
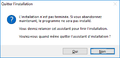
13.Leave the setup


Installing the API REST extension
Requirements
Node.js version 8.10 or higher must be installed on the server.
Installation
- Link to download Node.js: if Node.js is not installed on the server, this link redirects you to the download page
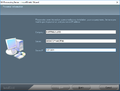
- Installation parameters: the listening port from which the API REST is available
- Confirm the installation: once you have clicked on the installation button, a loading page appears as the extension is installed
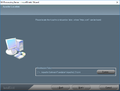
- Loading page: this page shows the state of the installation, this can take a few minutes. Once the extension is installed, an ending page is displayed
1.Link to download Node.js
2.Installation parameters
3.Confirm the installation
4.Loading page


post-installation configuration on Windows
Software keys
Once the installation is finished, the first thing you have to do is enter the license keys.
- Open the Software activation application in the list of applications
- Enter the license keys: check the Software key box, two input fields appear.
- In the first field: enter the product number (number from 1 to 5)
- In the second field: enter the license keys (combination of numbers and uppercase letters, separated by dashes)
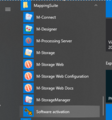
Open Software activation
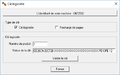
Enter the software keys


Launching the interface
Once the installation is finished, the Apache service needs to be restarted before accessing the managing web interface of ONYX Server.
1. Open your web browser
2. Enter the following URL:
- From the local server:
http://127.0.0.1:8002 - From a workstation in the network:
http://<ip.du.serveur>:8002
8002 étant le port configuré par défaut lors de l'installation
Erreurs fréquemment rencontrées
Si le port 8002 est déjà occupé
Dans ce cas, Apache ne peut pas redémarrer. Il suffit alors de modifier le port utilisé pour accéder à l'interface Web du serveur Mapping :
- Ouvrir le fichier de configuration d'Apache, httpd.conf (il se trouve dans le dossier conf, référencé lors de l'installation)
- Chercher le bloc de configuration situé entre #BEGIN_MAPPING et #END_MAPPING (généralement en bas du fichier)
- Modifier le port d'écoute 8002 dans les lignes suivantes :
- Listen 8002
- NameVirtualHost *:8002
- <VirtualHost *:8002>
Puis, redémarrer le service Apache.
Message d'erreur à l'ouverture de la page
Il est possible qu'une erreur se produise à l'ouverture de la page Mapping. Si la version 2.4 d'Apache a été installée, il faut activer le module mod_access_compat dans le fichier de configuration d'Apache httpd.conf.
Pour cela :
- Ouvrir le fichier de configuration d'Apache, httpd.conf (il se trouve dans le dossier conf, référencé lors de l'installation)
- Chercher la ligne contenant
mod_acces_compat.so
Supprimer le caractère # en début de ligne comme illustré dans l'exemple suivant :
#LoadModule access_compat_module /usr/lib/apache/mod_access_compat.so
LoadModule access_compat_module /usr/lib/apache/mod_access_compat.so
Puis, redémarrer le service Apache.
Démarrer le Spooler Mapping
Pour activer le spooler Mapping :
- Ouvrir l'interface de M-processing Server
- Cliquer sur les icônes suivantes dans l'ordre :
- Menu d'Administration
- Gestion des Impressions
- Gestion du Spooler
- Démarrer le Spooler
Une fois le spooler démarré, un service nommé Mapping_spooler apparaît dans la liste des services Windows (services.msc)
Mise à jour de M-Processing Server
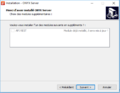
- Lancer le setup et de choisir l'option Repair
- Si la question "Do you confirm the update of this environment?" apparaît, cliquer Oui
- La mise a jour se déroule, si une erreur concernant map_daemon.exe apparaît, vérifier que le service Mapping_Spooler est bien arrêté. L'arrêter s'il est toujours actif.
- Cliquer sur Finish pour terminer la mise à jour de M-Processing Server et afficher la fenêtre des extensions.

1.Choisir l'option mise à jour
3.Chargement de la mise à jour
4.Termine la mise à jour


Mise à jour de l'extension API REST
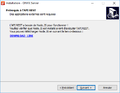
Si l'extension est déjà installée, seule la mise à jour est disponible.
- Cliquer sur Suivant mettra à jour les extensions.
1.Mettre à jour l'extension
