ONYX - 9.0 - Installation - Installation ONYX Server sur Linux/en
Différence entre versions
(Page créée avec « ===Selecting a work environment=== ») |
(Page créée avec « Before using the ONYX Server,load the environment in which works must be carried out, even if there is only ONYX Server installed on the server. ») |
||
| Ligne 114 : | Ligne 114 : | ||
===Selecting a work environment=== | ===Selecting a work environment=== | ||
| − | + | Before using the ONYX Server,load the environment in which works must be carried out, even if there is only ONYX Server installed on the server. | |
<u>En mode console (session telnet)</u> | <u>En mode console (session telnet)</u> | ||
Version du 12 juillet 2019 à 13:57
Sommaire
Introduction
This guide explains how to install ONYX Server on Linux. It is also generally recommended to update other software modules in the suite to prevent any version conflict.
Requirements
Setup
ONYX Server Linux is compatible with the following operating system versions:
- Red Hat Enterprise Linux 7
- CentOS 7
Required disk space on Linux:
- 1 Go minimum to unzip the installation package
- 500 Mo minimum for the installation
System:
- 2 VCPU
- Processor type x86-32 or x86-64
- RAM: 2 Go minimum, 4 Go recommended. Possibly more depending on the complexity of your architecture
Software
- Apache
- An Apache Web server, version 2.2 or 2.4 is required. It must be installed before installing ONYX Server. Path to the binary and configuration file is asked upon installation.
- Example:
#yum install httpd
- Deactivating SELinux
- To start up Apache on DocumentRoots located in Mapping folders, SELinux must be deactivated
- Example:
#setenforce 0 - For it to be deactivated at every start-up, edit the file /etc/selinux/config as follows:
SELINUX=disabled
- sFTP
- Access to the server in sFTP (ssh) is required.
- 32bits Libraries
- ONYX Server 9.0 is built in 32 bits, 32 bits (i686) packages must be installed beforehand for the librairies C (libc) and STDC++ (libstdc++) on operating systems in 64 bits.
- Example:
 #yum install libstdc++.i686
 #yum install glibc.i686
- Network Ports
- ONYX Server uses 3 ports for internal communications (between processes) and external ones (admin Web interface).
- The following ports are used by default:
- 8002 (Web port)
- 515 (LPD listening port)
- 2000 (internal port of the Mapping Spooler)
- Check that these ports are opened and available (that are not already used) for ONYX Server, if not, choose other ports for the installation. The LPD/LPR server of the system must then be stopped to clear the port 515.
- Security
- ONYX Server must be installed with either a profile which has admin rights on the server, or the root account. If necessary, two new user accounts will be automatically created upon installation: mapadmin (default name, this can be changed) and nobodyma.
Installation Process
Installation packages of the software can be downloaded on the Mapping technical server, at: https://serveur.mappingsuite.com. They are called "[OS]_[version].tar.gz".
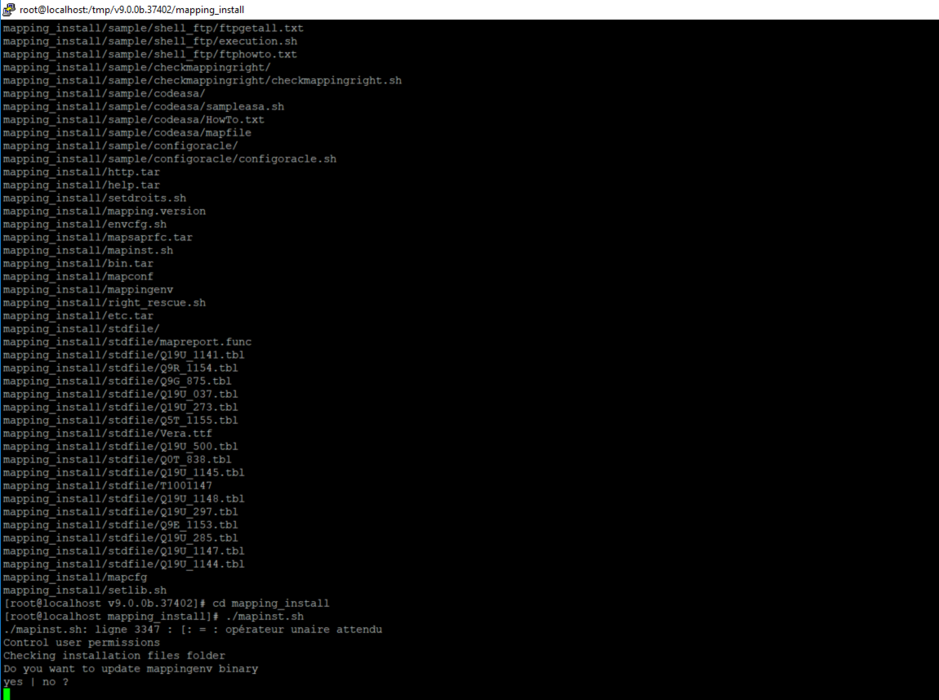
To install ONYX Server software, the archive file must be in FTP in binary mode on the Linux server in a folder you chose (example: /tmp). The archive file must then be unzipped with the root profile:
gzip -d Setup_Onyx_Server_Linux_v9.0.0b.37402.tar.gz
tar –xvf Setup_Onyx_Server_Linux_v9.0.0b.37402.tar
cd v9.0.0b.37402
gzip -d mapping_install_Linux_v9.0.0b.37402.tar.gz
tar –xvf mapping_install_Linux_v9.0.0b.37402.tar
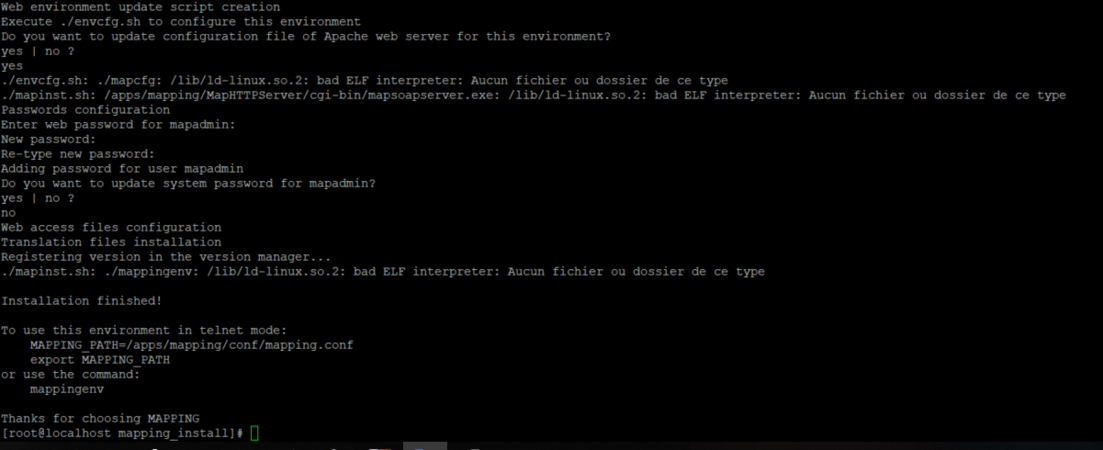
A "mapping_install" folder, in which the installation script must be run, is created (always with the root profile):
cd mapping_install
./mapinst.sh
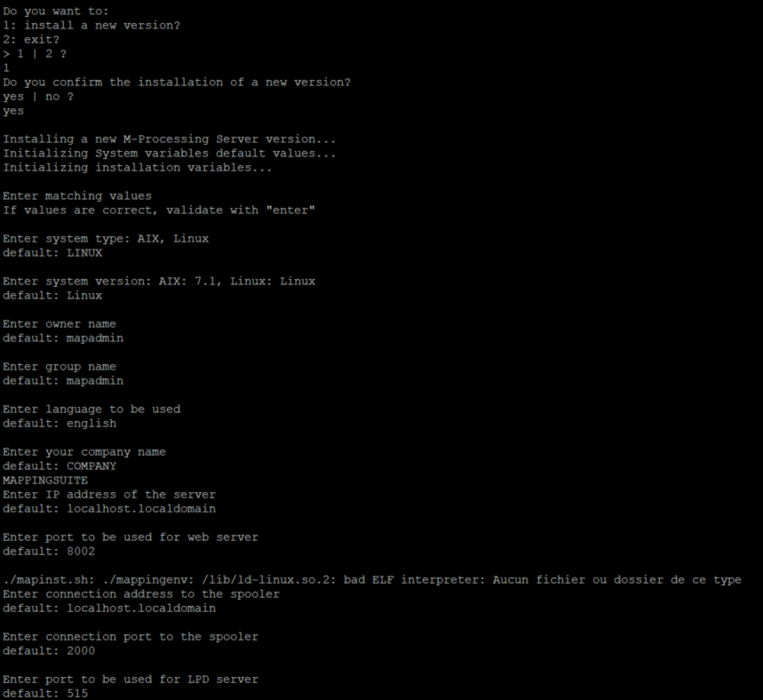
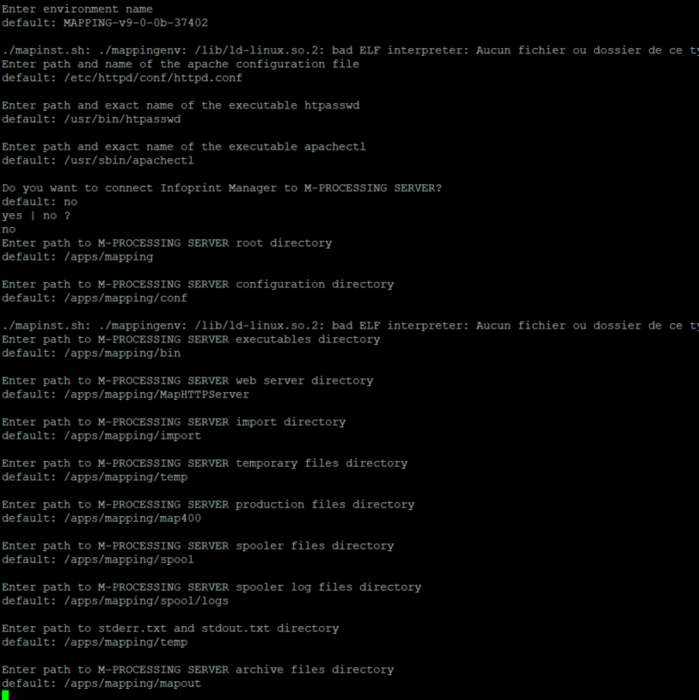
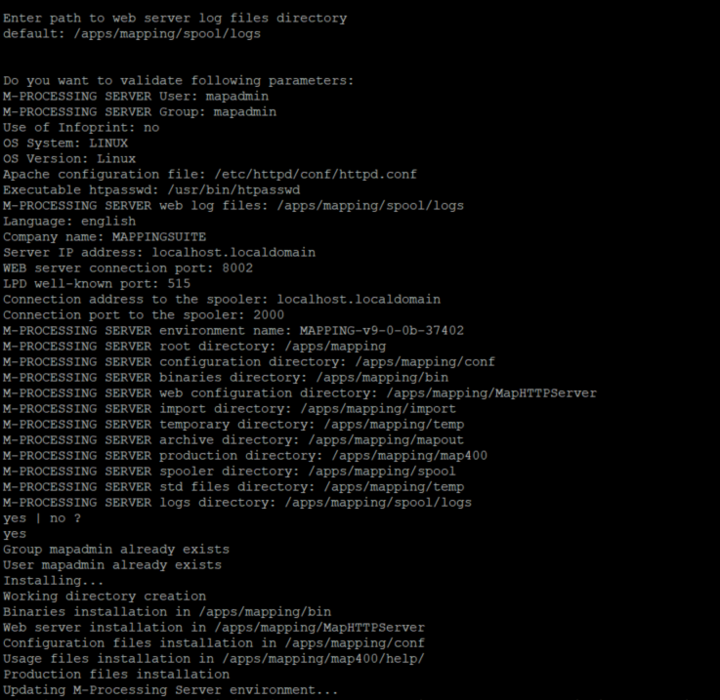
The script guides the user during the installation process by asking for all the necessary information to configure the installation of the ONYX Server.
Note: Localhost(127.0.0.1) is a recommended value so that duplicating the environment afterwards is easier, even on a new server.
Note: The script then builds all the default installation paths from the root folder to place all the ONYX Server files in the same folder. Each path can however be changed depending on the targeted architecture.
Managing the ONYX Server environment
With Linux systems, several ONYX Server environments can be installed and used on the same server. Each environment is then entirely independent from the others and has its own configuration, processings, engine version, activation licenses. Managing these different ONYX Server environments can be done using the program mappingenv.
ONYX Environments
On the server, the different ONYX Server environments are saved in a file: mappingtab, which is by default in the /etc folder. If this file is in another folder, it needs to be specified in the following command lines, using the argument -pathconf:XXX. An environment consists of a name, a connection port (Web port via the Apache server) and a configuration file (path of the mapping.conf file). Each parameter must be unique. On the same server, two ONYX Server environments must not have the same name, neither Web port, nor configuration file.
Selecting a work environment
Before using the ONYX Server,load the environment in which works must be carried out, even if there is only ONYX Server installed on the server.
En mode console (session telnet)
Le chargement d’un environnement ONYX Server se fait grâce au binaire mappingenv. Lors de l’installation, la copie de ce binaire sur le système est proposée. Il est indispensable de copier ce binaire pour enregistrer et utiliser l’environnement installé.
Le programme mappingenv doit être accessible par tous les utilisateurs exécutant ONYX Server en mode console.
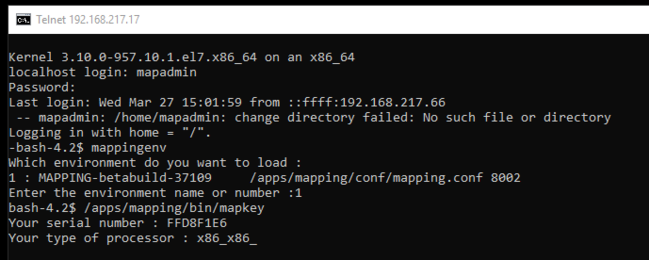
Pour charger un environnement ONYX Server en ligne de commande, après s’être connecté en Telnet sur le serveur, il faut exécuter la commande mappingenv puis saisir le nom ou le numéro de l’environnement voulu.
En mode console (SSH)
En mode graphique(interface Web)
Le fait de se connecter à l’interface Web d'ONYX Server sur un port particulier suffit à identifier et charger l’environnement de travail.
Exemple : l’adresse http://192.168.217.17:8002 charge l’environnement MAPPING
Dans les scripts
Pour la rédaction de tout script avant d'exécuter des commandes ONYX Server, il est également nécessaire de charger l’environnement de travail. Il n’est pas possible d’utiliser le binaire mappingenv (mode interactif) dans ces cas-là. L’équivalent est l’exportation de la variable d’environnement MAPPING_PATH, identifiant le fichier de configuration de l’environnement ONYX Server dans lequel l’exécution doit se dérouler.
Exemple de script pour démarrer le Spooler ONYX Server de l’environnement MAPPING :
#!/usr/bin/ksh
################################################################
# Mapping Suite Spooler Start                                  #
################################################################
export MAPPING_PATH=/apps/mapping/conf/mapping.conf

TIMESTAMP=$(date +"%Y/%m/%d-%H.%M.%S")
echo "Mapping is starting at $TIMESTAMP"
/apps/mapping/bin/map_daemon start
Activation logicielle
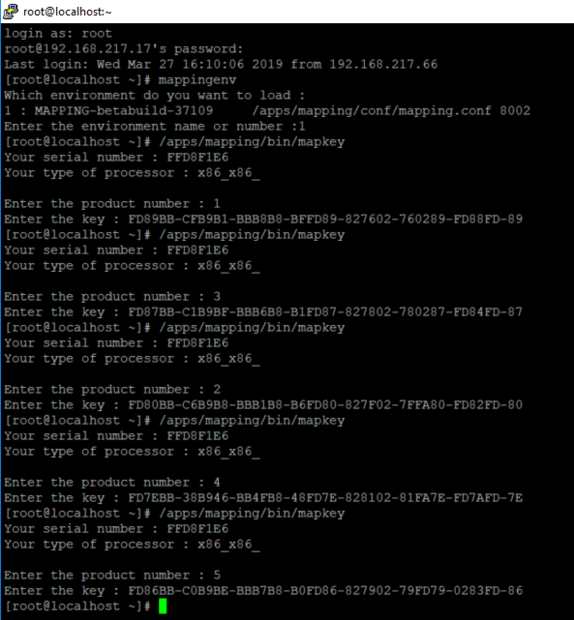
Après avoir installé le logiciel, celui-ci doit être activé en saisissant des clés logicielles. Ces licences sont dépendantes d’informations systèmes du serveur. Pour obtenir les licences :
- Récupérer les identifiants du serveur
- Puis contacter le Support Technique, ou se connecter sur https://serveur.mappingsuite.com.
Identifiant serveur
bash-4.2$ mappingenv
Quel environnement voulez-vous charger :

1 : MAPPING  /apps/mapping/conf/mapping.conf    8002    Active
2 : MAPPING_test  /apps/mapping_test/conf/mapping.conf    8003    Active
Entrez le nom ou le numéro de l'environnement : 1

bash-4.5$ /apps/mapping/bin/mapkey
Le numéro de série de votre machine : FFD8F1E6
Votre type de processeur : x86_x86_
Saisie des licences d'activation
Une fois les licences calculées par Mapping, répéter les étapes précédentes pour saisir chaque clé obtenue. Chaque clé fournie par Mapping est identifiée par un numéro de produit (de 1 à 5) et une valeur de clé (44 caractères hexadécimaux, séparés ou non par des tirets de mise en forme).
