ONYX - 9.0 - Utilisation
Access right management
Sommaire
Access right management
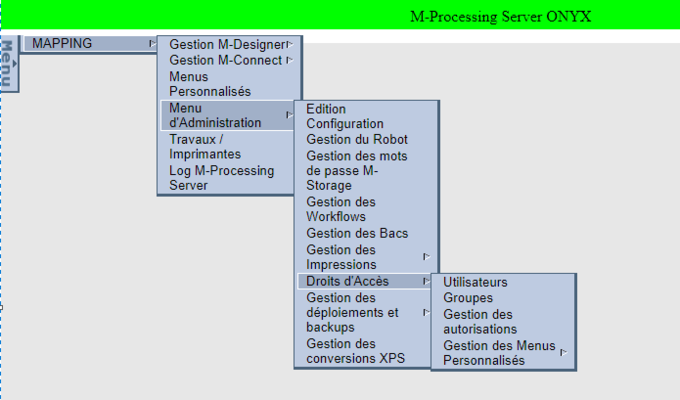
The Access rights management section is found in the Administration Menu. It will allow user access to the ONYX Server interface to be administered.
Creating a user
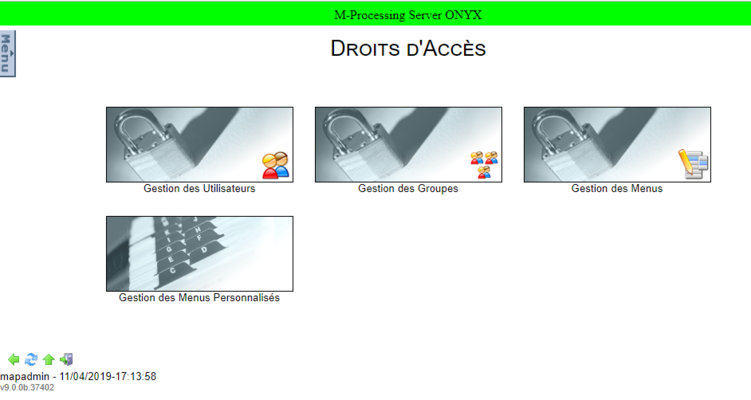
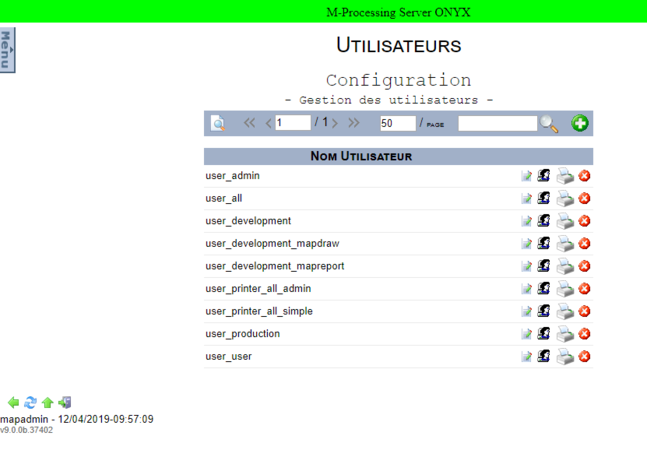
To create a new user, click on the User Management section. The following page opens:
For each user defined on the interface, it is possible to:
![]() Edit an account
Edit an account ![]() Define a user default printer
Define a user default printer
Changing the password
Note:
By default there are several users defined on the interface. The tool 120px makes it easier to search for a user.
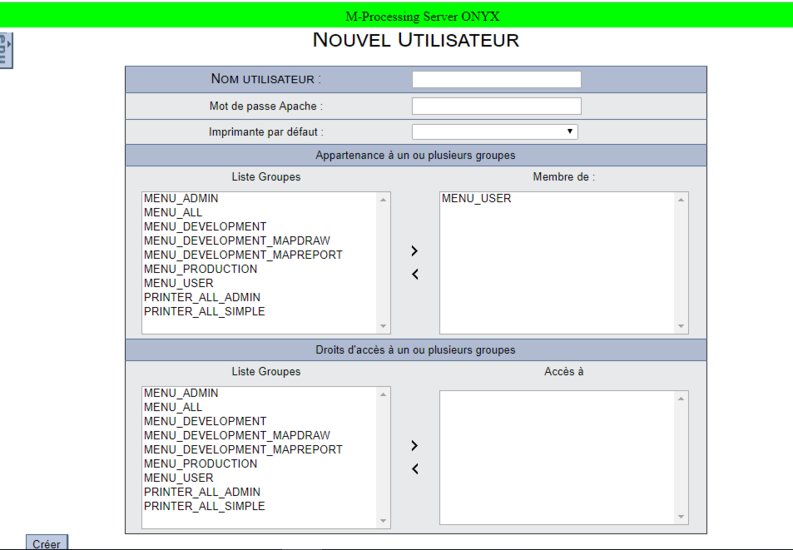
The creation of a user is started using the icon ![]() which opens the following page:
which opens the following page:
- User name = name of the user to create,
- Apache password = user password,
- Default printer = name of the printer to associate with the user,
- Membership in one or more groups = the user will belong to the groups defined in this area,
- Access rights to one or more groups = the user will have access to spools which belong to users who are members of the groups defined in this area.
To finalize the creation, click on the “Create” button.
Note: For a user to be able to view the content of a queue, they must absolutely have a role (Admin or simple) on it.
Creating a group
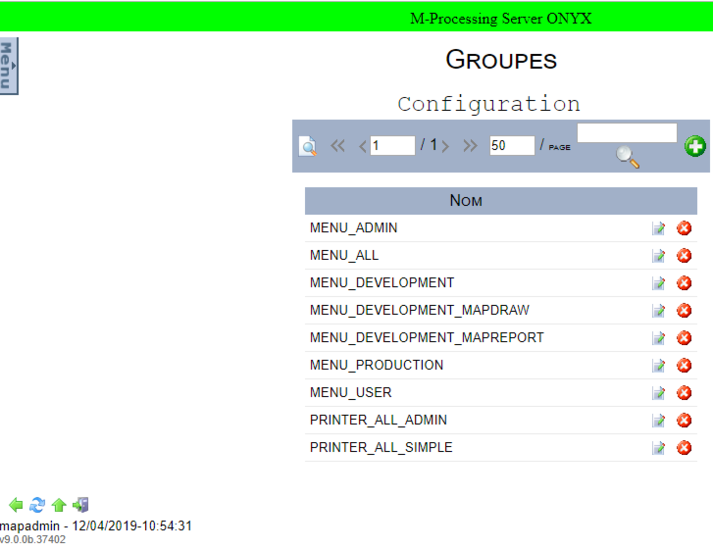
To create a new group, click on the Group management section. The following page opens:
For each group defined on the interface, it is possible to:
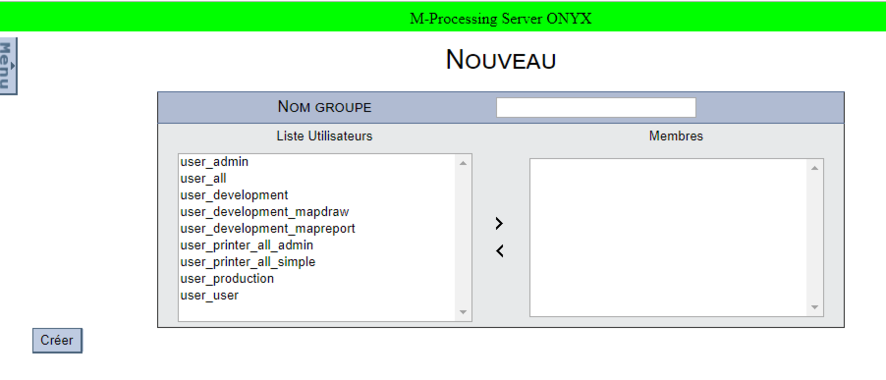
The creation of a group is started using the icon ![]() which opens the following page:
which opens the following page:
- Group name = name of the group to create,
- Users list = group members.
To finalize the creation, click on the “Create” button
How to grant rights to a user or group
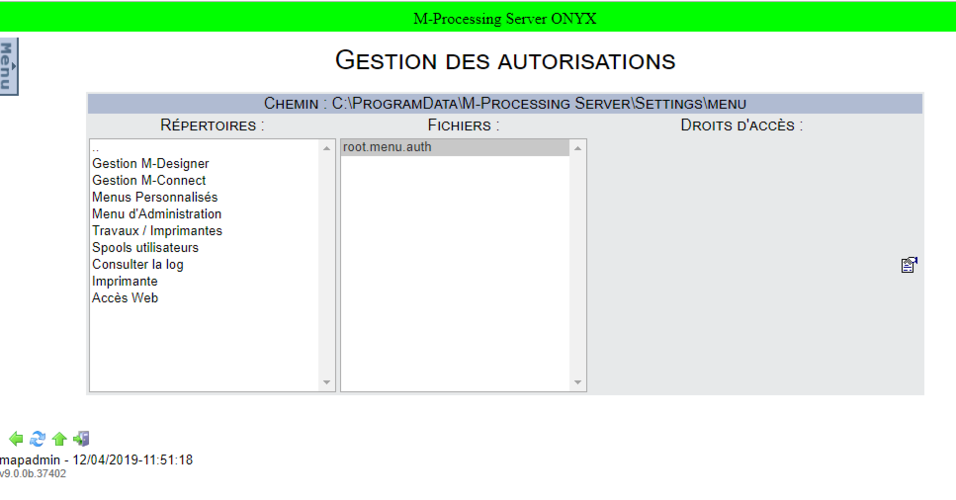
In order to grant rights to a user or group, click on the Menu management section which opens the Authorization management page.
This page is divided into three sections:
- Directories,
- Files,
- Access rights.
The Directories section allows you to select the menu to give access to. Each directory is linked with an authentication file (Files section). It is in this file that access to the corresponding menu is defined.
Main files:
- Root.menu.auth > All menus
- Format.menu.auth > Management of M-Designer formats
- Mapping Mapreport.menu.auth > M-Connect management
- Custom.menu.auth > Custom Menus
- Operation.menu.auth > Administration menu
- Files.menu.auth > File management
- Spooling.menu.auth > Job management
- Valid.menu.auth > User spools
To give access to a menu, select a directory, the authentication file is displayed. Click on it, the users as well as the groups who have access to this menu then appear in the Access rights section.
To add a user or group click on the icon ![]() .
.
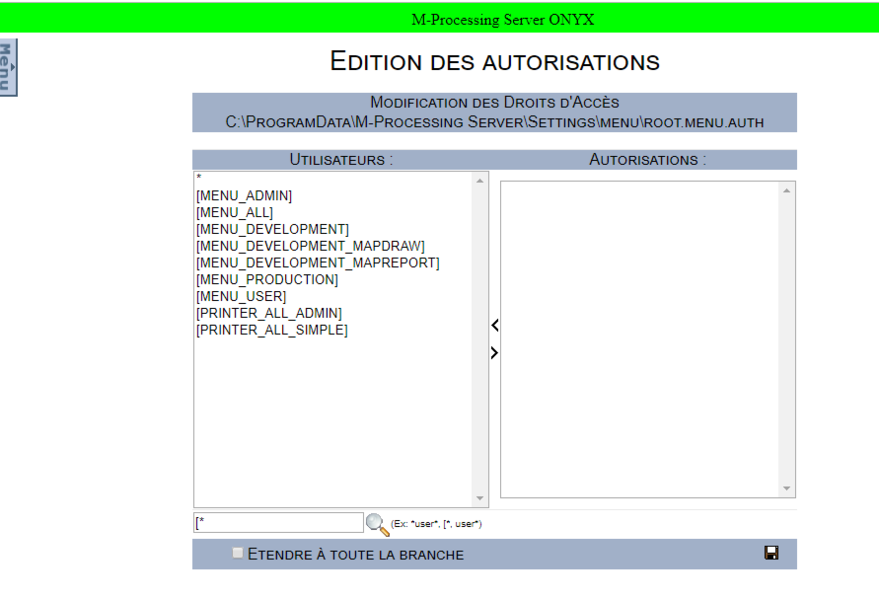
The following page opens:
- Users = Users or groups who do not have access to the menu,
- Autorisations = Utilisateurs ou groupes qui ont accès au menu.
Pour chaque menu, il y a la possibilité de cocher la case "Etendre à toute la branche". Si cette case est cochée, cela donne aux utilisateurs l’accès au menu en train d’être configurés ainsi qu’à tous ses sous-répertoires.
Remarque :
Cette manipulation est à utiliser avec précaution. En effet, si par la suite vous voulez faire marche arrière, vous serez obligé de revenir sur l’ensemble des sous-répertoires et de supprimer les accès de chacun des utilisateurs et des groupes.
