Translations - ONYX - 9.0 - Utilisation
Partie Dynamique de ONYX Designer/83/en
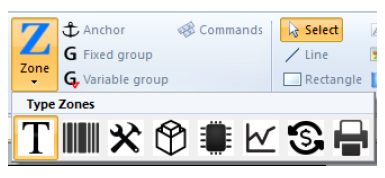
Select the corresponding icon and its type in the Data tab and hold the button of your mouse down where you want the element to be placed. This method creates an empty zone. To link the zone to an element of data from the source file, select the data in the spooled file view (see the second method below) then, drag and drop it in the zone which was created previously, by holding down the Ctrl key.

Select the data to be recovered in the Spooled file view then, drag and drop it where you want, in the designing space to create a zone automatically linked to the data you selected.

Once the zone has been created, select it and display the 'Properties view to fill in the following information:

Name :
Name (of the zone): this information is used as internal information in Designer, it identifies the different objets in the project. When creating the zone from the data tab, this field is empty, its value is given by the data linked to it from the Spooled file view.
Text printed before/after: to add text before and/or after the retrieved information.
Position :
Position of the information in the data spooled file: column, length, beginning line.
This is also used to extract a certain quantity of information in XML mode.
Position in the document:
to change the position of the zone on the page.
Data Type:
defines how the Designer application processes the information retrieved (see a.3 Types of zones).
Font:
To set all formatting options: font, size, colour, framing, orientation, etc.