ONYX - 9.0 - Usage
Managing workflows - The fundamentals
Sommaire
Introduction
Workflows make up the ONYX Server execution engine. A Workflow is defined as a set of conditions and configurable commands, run as a new file is received by input connectors (Scanfolder robots, listening server, entry point, or Web Service query). Commands are processed sequentially which means the second command is processed once the first one was processed correctly, and so on until the end of the Workflow.
A Workflow is defined graphically by several command objects, conditions and/or parameters connected together. Its name is unique and it must be associated with at least one connector to be active.
Workflows are saved on disk in XML files in the workflow sub-folder of the rule folder specified by the RULES_PATH configuration variable.
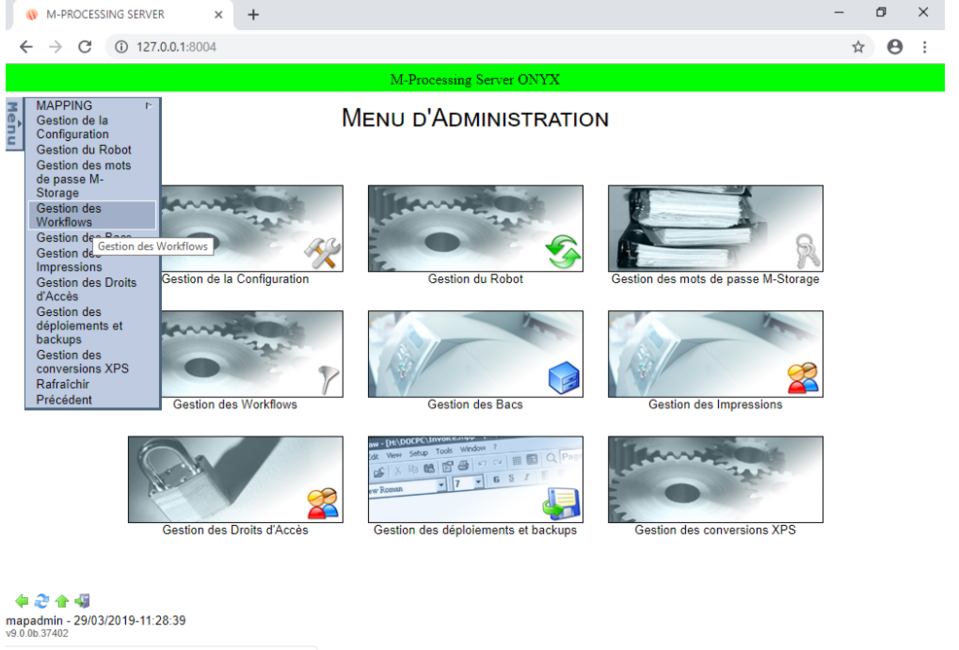
The administration and Workflow configuration pages are accessible from the ONYX Server Web interface using the Administration Menu, go to Managing Workflows, or use the direct link: http://127.0.0.1:8004/JS_Common/workflow/index.html
Tips: Firefox is the recommended browser for a better user experience.
Configuration
A new WORKFLOW section is added to the ONYX Server configuration file which contains configuration parameters for the Workflows execution engine and for the Web Service features (SOAP_*):
| Name | Meaning / Example |
|---|---|
| SOAP_DEBUG | Activates verbose mode for Web Services
On / Off (by default) |
| SOAP_PATH_TEMP | Local path to access temporary files
E:\MappingWindows\Temp\HTTPServer |
| SOAP_PATH_LOG | Local path to access the logs
E:\MappingWindows\Temp\HTTPServer |
| SOAP_LOCAL_URL | Local path to the shared folder (file exchanges) |
| SOAP_DOCUMENT_URL | Remote path to the shared folder (file exchanges) |
| SOAP_LOCATION | Remote path of the Mapping Web Services engine |
| SOAP_HOST_PROXY | IP address or DNS name of the Proxy server (if needed) |
| SOAP_PORT_PROXY | Connection port to the Proxy server (if needed) |
| USE_NEW_RULES | Activates the Workflows engine or returns to the v6 engine
On (by default) / Off |
| MAIL_SERVER | IP address or DNS name of the SMTP server (Mail commands)
outlook.office365.com |
| MAIL_DOMAIN | Domain name of the outlook.com SMTP server |
| MAIL_PORT | Connection port of the SMTP 587 server |
| MAIL_LOGIN | Login ID for the SMTP server |
| MAIL_PASSWORD | Password for the previous ID |
| MAIL_FROM | Default sender's address |
| TRACKING_SERVERADDRESS | IP address of the tracking PostGreSQL 127.0.0.1 database |
| TRACKING_SERVERPORT | Connection port to the tracking 5432 database |
| TRACKING_SERVERUSER | Login ID for the tracking database |
| TRACKING_SERVERPASSWORD | Password for the previous ID |
| TRACKING_SERVERBASENAME | Name of the tracking database
tracking |
| TRACKING_LIB_PATH | Path of the PostGreSQL executables
C:\Program Files\PostgreSQL\9.0\bin |
| TRACKING_SERVERSCHEMA | Schema of the tracking database
public |
| DEFAULT_ADMINISTRATOR_RESPONSE | Path of the HTML default response file (Web Interactivity commands) |
| DEFAULT_ADMINISTRATOR_RESPONSE_HEADER | Type (content-type) of the default response
text/html |
| DEFAULT_RESPONSE_BODY | Path of the HTML default response body file (Web Interactivity commands) |
| DEFAULT_FILE_TYPE | Path of the HTML default message header file (Web Interactivity commands) |
| DEFAULT_MAIL_BODY | Path of the HTML default message body file (Web Interactivity commands) |
| PATH_CONFIG_CUSTOM_ACCESS | Path of the user display preferences (MOM 2.0)
E:\MappingWindows\Settings\configCustomAccess |
| PATH_DJDE | Path of the DJDE resources (Xerox conversions)
E:\MappingWindows\Temp\DJDE |
| RESOLVE_PERPAGE | Number of lines per page for resolution tables display 25 |
| MAP_CURRENT_DATE | Syntax control to retrieve the current date
%d/%m/%Y |
| MAP_CURRENT_TIME | Syntax control to retrieve the current time
%H:%M:%S |
| MAP_CURRENT_TIMESTAMP | Syntax control to retrieve the current timestamp %d-%m-%Y_%H%M%S |
Toolbar
- Create a new Workflow. enter the name of the Workflow, its extension, .rules.xml is automatically added.
- Open a Workflow. Select a Workflow in the list.
- Save the active Workflow.
- Save the active Workflow under another name.
- Delete the active Workflow.
- Insert a condition in the active Workflow. The new condition is added after the selected box.
- Insert a command in the active Workflow. The new command is added after the selected box.
- Insert a parameter in the active Workflow. The new parameter is added after the selected box.
- Redraw the active Workflow = graphically redraw the Workflow: aligns the boxes, links, etc…
- Duplicate an object = duplicates the selected object exactly as it is (name, parameters, etc.), without its links.
- Manage resolution tables = allows you to create, edit and delete resolution tables
Creating a new workflow
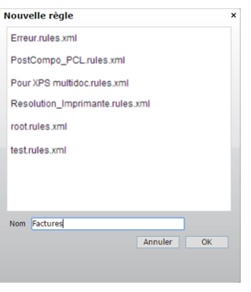
Click on the ![]() icon and name the Workflow (here called Invoices) then, validate.
icon and name the Workflow (here called Invoices) then, validate.
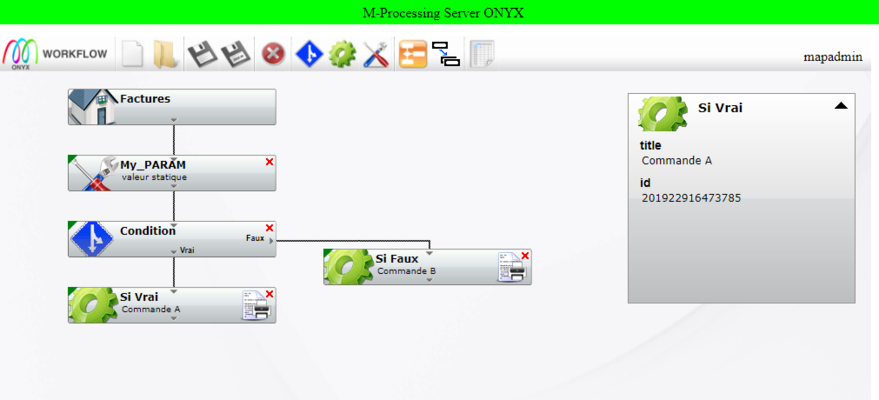
The new Workflow is displayed in the editing window with a first box which corresponds to the starting point of the processing sequence:
Note: to import a Workflow, copy it under C:\ProgramDta\M-Processing Server\Settings\rules\workflow
To view the imported Workflow, Go to Menu->Administration Menu->Managing Workflows, then, click on open.
Adding a parameter
Definition
Parameter objects define the value of a parameter or create a new one. A parameter can then be used as a condition or command. A value can then be reused in several commands, for example, without having to be defined each time.
Create/Edit
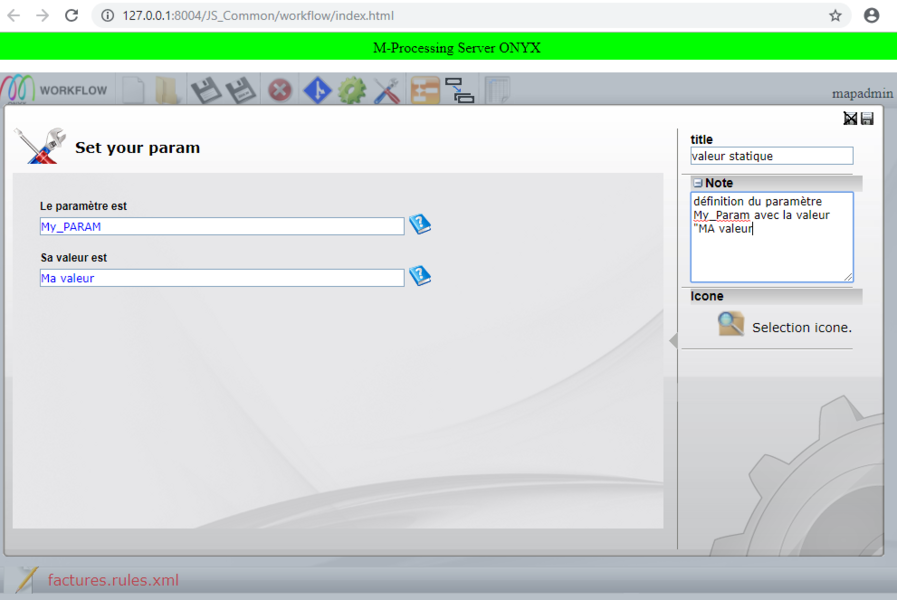
To create a new parameter, select the box after which the new parameter needs to be added, then, click on the ![]() icon. To edit an existing parameter, double-click on the corresponding box.
The editing window opens so as to define the different fields:
icon. To edit an existing parameter, double-click on the corresponding box.
The editing window opens so as to define the different fields:
Note: A parameter is usually reused later on in the Workflow in a condition or command, sometimes even in another Workflow. Choosing names which correspond to the information conveyed is therefore recommended.
Value
Different methods can be accessed through the context menu to define the value of a parameter in the input field:
- param = dynamic value of a system environment parameter, linked to Onyx Server, the Workflow or the input spooled file.
- value = static value entered by the user.
- rulefile = dynamic value in a text or an XML file (may be the input spooled file, or any other file).
- command = dynamic value obtained after a predefined Onyx Server command was executed.
- cmd = dynamic value obtained after a user script was executed.
- SQL = dynamic value obtained after an SQL request (SELECT type in this case) was executed.
- resolve =: dynamic value obtained after a research in a resolution table.
- rulefile_multiple = defines several parameters with a dynamic value at once, with information in the same input file (in XML mode only).
Depending on the type of field needed, predictive text can be used, this option displays a new interface to configure the dynamic recovery of the value:
| Type of function | Content | Icon | Type indicator |
|---|---|---|---|
| Parameter | Parameter of the application | Text in blue | |
| None | Free text or list | none | Text in black |
| RuleFile | Value in a datafile | Text of the cell | rulefile: keyword(Test) |
| Command | Retrieval of a predefined command | Text of the cell | Command: cutposition |
| Cmd | Retrieval of a command line | Text of the cell | cmd: completepath... |
| SQL | Retrieval of an SQL request | Text of the cell | SQL: Select... |
| Resolution table | Retrieval of a resolution table | Text of the cell | Resolve: TABLE[PARAM] |
| Rulefile multiple | Values in the same file (XML) | Text of the cell | rulefile_multiple: xml |
Adding a condition
Definition
Condition objects define two different processings depending on the validity of a condition. Condition boxes are the only ones which have two outputs:
- at the bottom (direct path) if the condition is true (= True)
- on the right (bypath) if the condition is false (= False)
A condition is defined as a comparison between at least two values. A value can be a parameter, a constant, the result of a command or a script, of a research in a resolution table, of an SQL query, of a data file analysis.
Create/Edit
To create a new condition, select the box after which the condition needs to be added, then, click on the ![]() icon.
To edit an existing condition, double-click on the corresponding box.
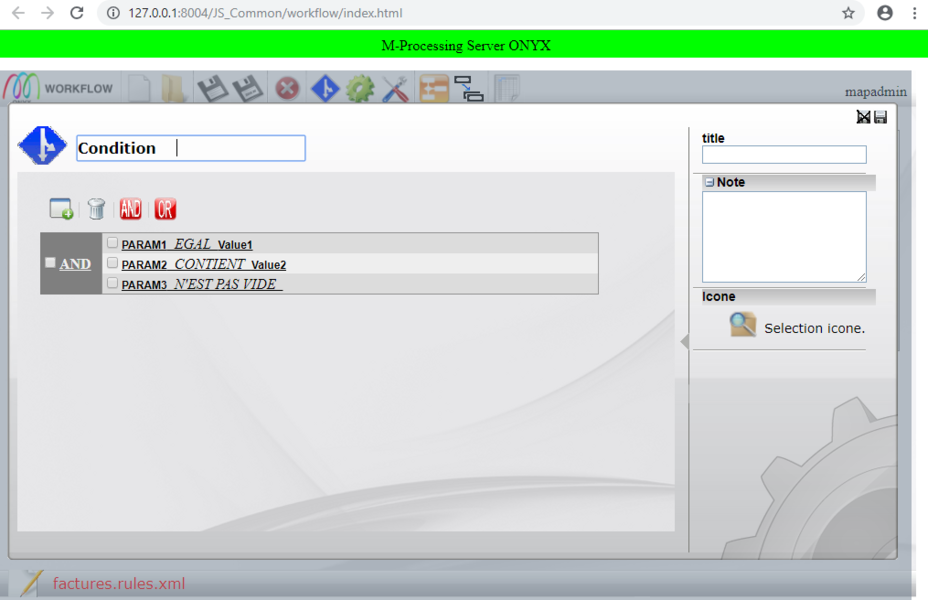
The condition editing window opens so as to define the different fields:
icon.
To edit an existing condition, double-click on the corresponding box.
The condition editing window opens so as to define the different fields:
- Condition: Name of the condition object (1)
- title: Title of the object
- AND , OR: Tools to define the logic of the condition: adding/deleting a filter, AND and OR logical operators.
- Param1 equals value1: Condition filters
- Note: Note (blank field for comments).
A condition needs to have at least one condition filter.
Tip: The field "Name of the object" (1) is optional, filling it in is, however, highly recommended. This information appears in the log associated with the Workflow, which allows you to identify the different stages of the Workflow easily. Examples: "Condition failed" if no name is provided, otherwise "Condition 'Name of the condition' failed".
Condition filter When creating a new condition you are automatically asked to set a first filter. Double-clicking on a condition allows you to edit it:
Param1 EQUALS Value1
- parma1: Value to compare
- EQUALS: Comparison operator
- value: Comparison value
The comparison operators available are:
- equal to / different from: strict alphanumerical comparison between 2 values,
- contains / does not contain: alphanumerical research of a value in another value,
- is empty / is not empty: does the parameter have a value?
- greater than / greater than or equal to: numerical comparison,
- less than/ less than or equal to: numerical comparison.
A condition can be defined by multiple condition filters. The ![]() button allows you to add a new condition filter.
The logic between these filters is defined graphically using the boxes to tick before each filter and the
button allows you to add a new condition filter.
The logic between these filters is defined graphically using the boxes to tick before each filter and the ![]() and
and
![]() tools.
tools.
In this example, the condition logic is defined by: filter A and (filter B or filter C). The ![]() button allows you to delete a selected condition filter, or a selected condition logic (and the associated filters).
button allows you to delete a selected condition filter, or a selected condition logic (and the associated filters).
Adding a command
Definition
Command objects allow you to run unitary processings. The Workflow includes as many commands as there are processings to run. Command objects allow you to run the four main groups of processings: predefined Onyx Server commands in direct language, user scripts, SQL queries, or calls to other Workflows.
Create/Edit
To create a new command, select the box after which the command needs to be added, then, click on the ![]() icon. To edit an existing command, double-click on the corresponding box.
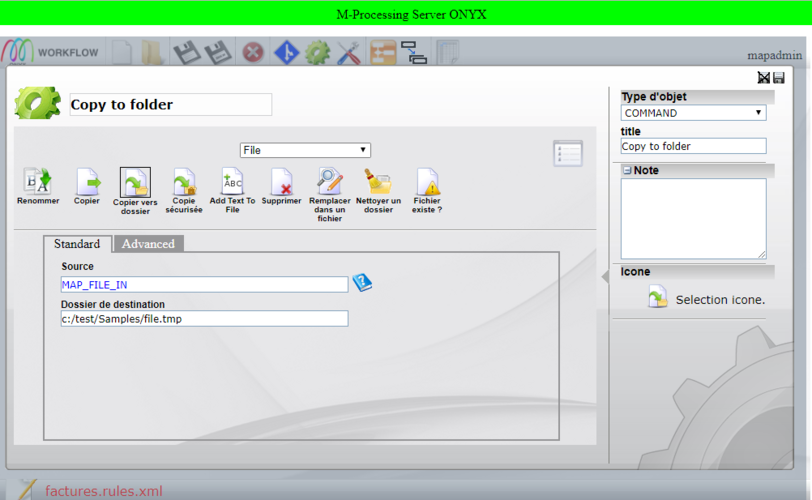
The command editing window opens so as to define the different fields:
icon. To edit an existing command, double-click on the corresponding box.
The command editing window opens so as to define the different fields:
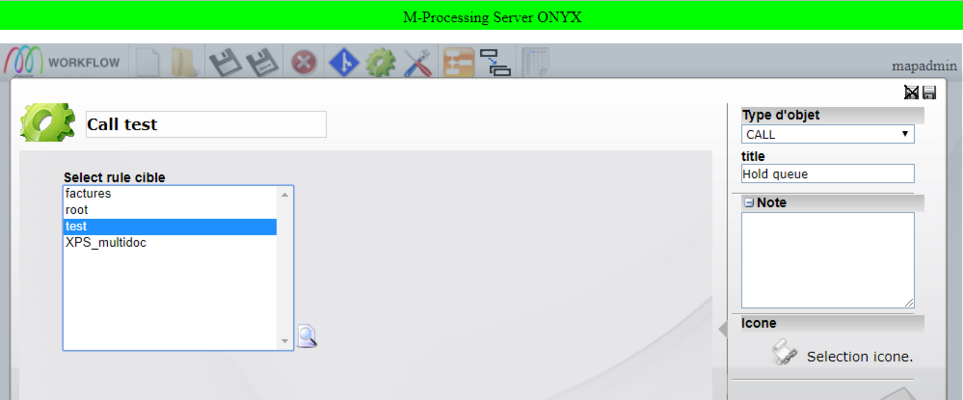
- Type of object: Type of processing Command, Cmd, Sql or Call,
- Name of the object,
- Title: Title of the object,
- File: group of predefined commands
- Copy to a folder: predefined command to run
- Source and destination folder: Parameters of the command
                 o Displays all the required or optional parameters for the command to be run smoothly
                 o The Standard tab includes the main parameters of the command
                 o Depending on the commands, other specific tabs display advanced parameters
- Note: blank field for comments.
Predefined commands (COMMAND)
This group of processings includes the generic commands and ONYX Server direct language commands. Commands are sorted by groups according to what they are used for: Spooler, File, Mapping, XPS Toolbox, Mail…
Amongst the most used ones are:
Mapping / Text M-Designer : application of a Designer format on a data file in text mode
- Standard:
-Name of the Designer format to use. The list of formats imported on the server can be seen by clicking on the predictive text button
-Sequence number (00010, or *MRG, or *ALL, etc.)
-Input file (data file)
-Output file (finished XPS document)
- Advanced:
-Translation language (See the Designer User Guide for translations)
-XPS file to add as watermark, indexes can also be recovered
- Text options:
-Maximum number of lines = an overflow can be set on the input data file, an "automatic" page break can also be set, -Page width: maximum number of characters per ligne to read in the input data file,
-Code page of the input file: converts to Unicode UTF-16 on the fly if needed. The list of code pages managed under ONYX Server can be seen by clicking on the predictive text button.
- Output options:
-Start page / end page: interval of pages to produce,
-Input bin / output bin: adds finishing options (PrintTicket) to the XPS document produced to manage printer bins.
Spooler / Print: sends a spooled file to the Onyx Server Spooler queue
- Standard:
-Name of the destination queue. The list of queues declared in the Spooler can be seen by clicking on the predictive text button,
-Name of the file to send,
-Title: name of the spooled file in the queue, -Send the spooled file to the destination queue in hold status,
-Keep the spooled file after it was processed in the destination queue,
-Keep the following attributes = associate the attributes of the current spooled file with the output spooled file,
-Add common parameters = associate the parameters of the current session with the output spooled file,
- Page:
-Start page / end page: adds the corresponding attribute to the destination spooled file for its processing interval,
-Number of copies: adds the corresponding attribute to the destination spooled file.
- Security:
-Owner of the destination spooled file,
-Access rights on the destination spooled file,
-Account code: associates the corresponding attribute.
- Userdatas:
-Additional attributes can be defined on the destination spooled file.
- Advanced:
-Priority level of the destination spooled file,
-Number of days during which the destination spooled file is stored,
-Number of days before the destination spooled file is compressed (this attribute is inherited from the IBM i environment, it is sometimes used by client applications upstream and downstream),
-Type of paper,
-Loyalty: this attribute is inherited from the IBM i environment, it is sometimes used by client applications upstream and downstream
-Name of the destination spooled file.
The complete list of ONYX Server predefined commands is detailed in Chapter 4.
User scripts
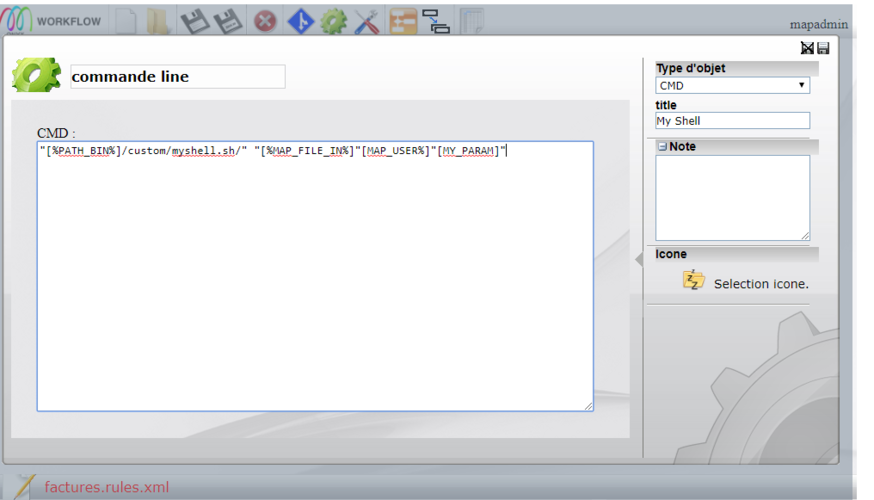
The CMD mode allows you to put the command object in text editing mode so as to type a complete command in, as would be done in telnet mode or in MS-DOS command windows. All environment parameters (system and Mapping) and attributes of the file being processed are accessible. The command being run can be a specific Onyx Server command, which is not available as a predefined command, or a complex script (*.bat or *.sh).
SQL queries
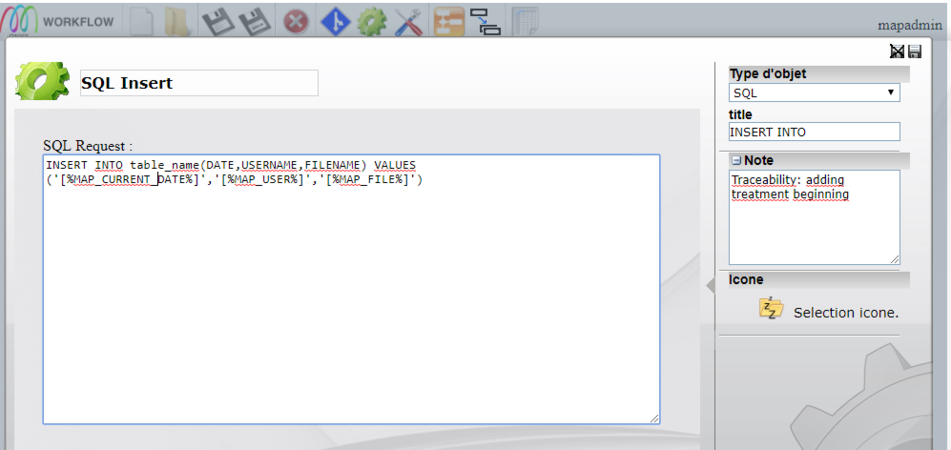
The SQL mode allows you to put the command object in text editing mode so as to run SQL orders. All environment parameters (system and Mapping) and attributes of the file being processed are accessible. Parameters to connect to the database must be defined in the Onyx Server configuration.
WORKFLOW calls (CALL)
The CALL mode allows you to run another Workflow in the current workflow, then to continue running the current Workflow once the second one has been correctly processed. All environment parameters (system and Mapping) and attributes of the file being processed are automatically transmitted to the sub-Workflow and can be used in it.
